Drywall Installation Hanging for Homes, Ceilings & Repairs
Get practical drywall installation hanging help from MrWalls, including ceilings, difficult spaces, repairs, finishing coordination, and DIY handoff options.
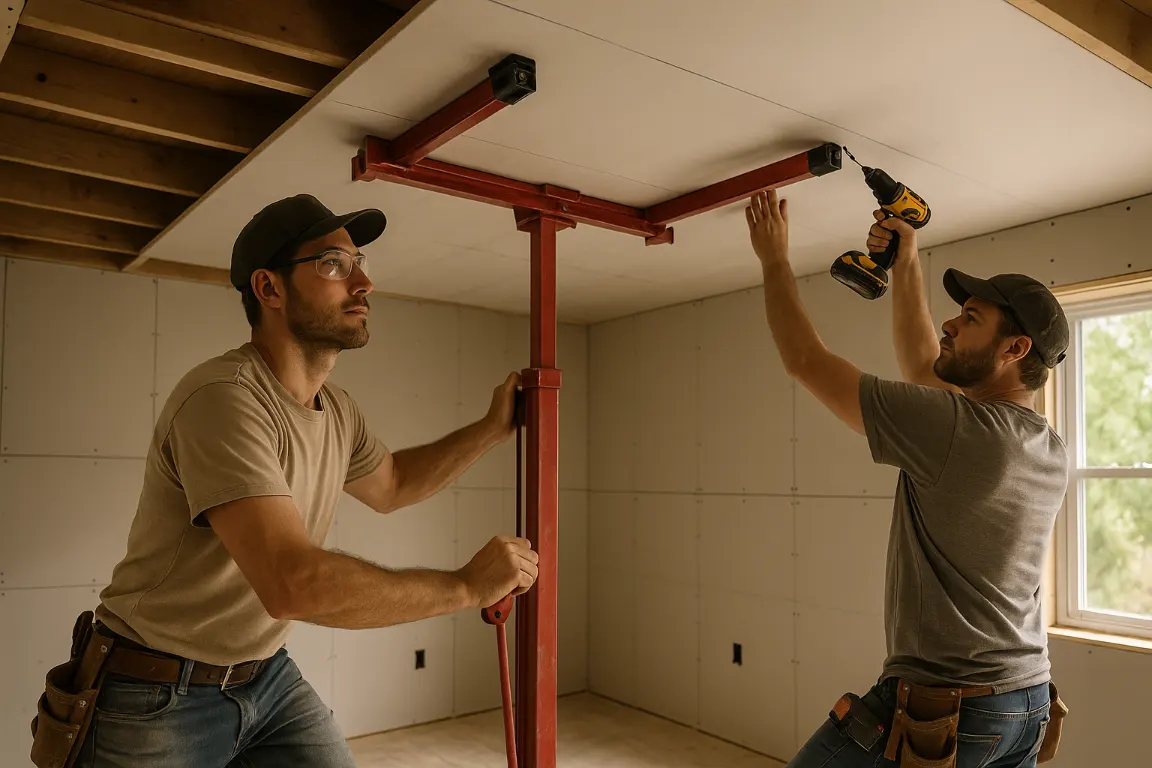
Get practical drywall installation hanging help from MrWalls, including ceilings, difficult spaces, repairs, finishing coordination, and DIY handoff options.
Drywall installation hanging shapes walls and ceiling surfaces before taping, compound, and paint begin. With thoughtful planning, properly sized drywall sheets, and securely placed drywall screws, you can create crisp, clean lines and a smooth finish. The work requires careful measuring, precise chalk lines, and the right saws for each cut. Every drywall panel needs a tailored fit around access panels, corners, and openings.
For homeowners, the key decision is whether to handle hanging drywall or hire a contractor. Small wall repairs may be manageable with the proper drywall tools, materials, screws, tape, corner bead, and attention to safety. Larger projects, including ceiling work, moisture-prone areas, and sheetrock installation requiring a seamless bead or finished corner, often benefit from professional installation. Experienced crews use a drywall lift for overhead panels, control dust, and know how to install sheetrock efficiently. Here’s what installing drywall involves and how to choose the right level of help.
MrWalls Drywall & Painting provides professional drywall hanging for new rooms, remodels, ceilings, repairs, and water-damage restoration. Careful framing assessment, material selection, panel layout, fastening, and moisture or fire-rated options create durable, smooth surfaces ready for finishing. From small repairs to full-service installations, the team manages preparation, dust control, seamless repairs, final walkthroughs, and paint-ready results.
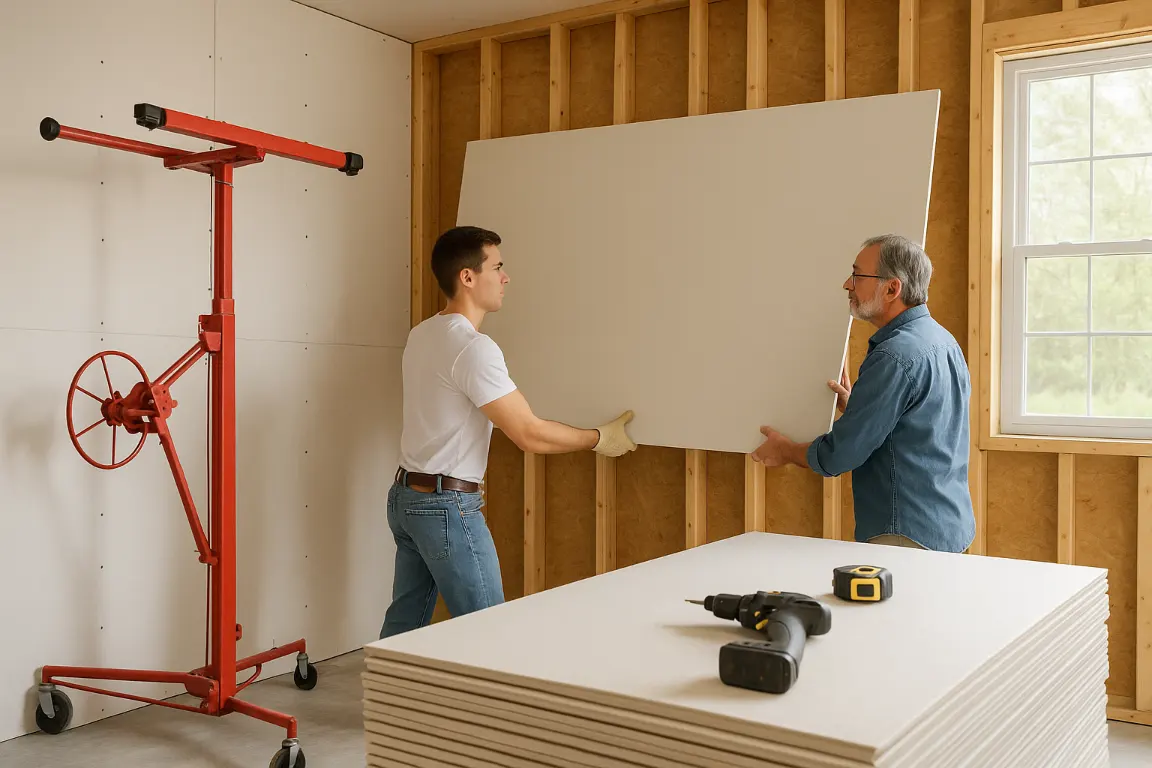
Professional drywall installation hanging is when a room starts to take on its finished form. At MrWalls Drywall & Painting, we plan each installation carefully, maintain a clean jobsite, and give lasting attention to wall and ceiling surfaces. Whether we are finishing a new room, rebuilding after water damage, updating an older home, or supporting a larger remodel, quality hanging sets the standard for every step that follows.
Proper drywall work begins with the framing. Before installing drywall, we check alignment, mark chalk lines, and add blocking wherever drywall sheets need support. We also plan for electrical boxes, plumbing penetrations, HVAC openings, windows, doors, and access panels. This preparation helps prevent loose edges, visible ridges, and avoidable cracking. We select the right materials for each space, including moisture-resistant board where humidity is a concern and standard sheetrock where it offers an ideal balance of value and performance.
On walls, drywall panel layout matters as much as fastening. We position panels to reduce seams, stagger joints where practical, and preserve factory edges where tape and compound support a smooth finish. Each cut is measured carefully around openings and at every corner. With dependable drywall tools, saws, and other tools, we keep edges clean while following safety practices that help control dust and protect the home. Fasteners, including drywall screws, are set to the proper depth: secure enough to hold the board firmly without breaking the paper face. The result is an even surface ready for professional taping, mudding, sanding, primer, and paint.
Ceiling installation requires added precision. A drywall lift helps our team safely position heavy drywall sheets, while the right screws and fastening pattern help reduce sagging, seam movement, and screw pops. We install each panel perpendicular to framing when conditions call for it and pay close attention to ceiling-to-wall transitions. We also install corner bead and bead details where needed for crisp, durable edges. For homeowners removing a popcorn ceiling, repairing a damaged area, or changing a room layout, these details create a more uniform finished surface.
Remodels often bring challenges that new construction does not: uneven framing, settled structures, previous repairs, and finishes that need to blend seamlessly. We shape the sheetrock installation plan around those conditions rather than treating them as an afterthought. That may mean correcting a framing inconsistency, adding backing for a clean edge, replacing compromised drywall, or matching panel thickness to adjacent surfaces.
Reliable drywall installation is about more than covering studs. It is a coordinated process that protects the structure, creates straight, durable walls, and supports polished paintwork. From hanging drywall through final taping, MrWalls Drywall & Painting delivers careful work that makes the next phase of your project smoother and helps the finished space feel complete.
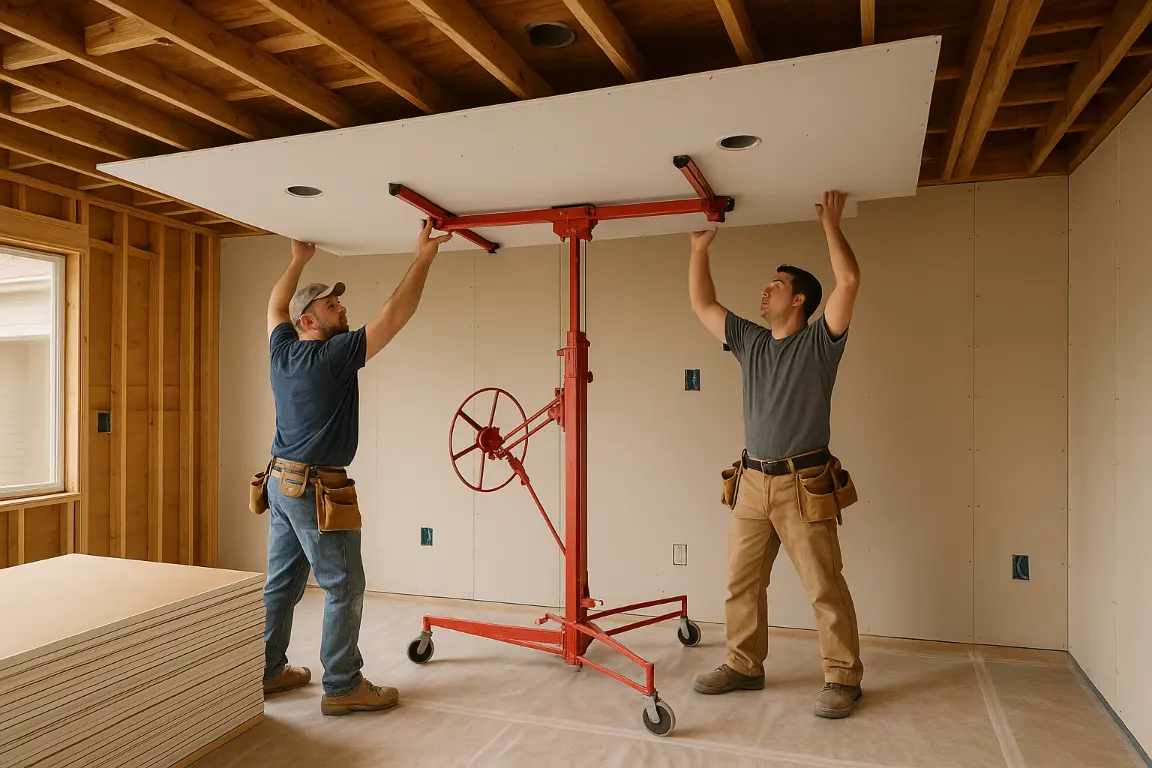
Drywall installation is the careful groundwork that prepares walls and a ceiling for paint. It starts with accurate measuring, clear chalk lines, and a planned cut for every opening. The right materials, drywall tools, saws, screws, and drywall screws help drywall sheets and each drywall panel stay straight, secure, and properly aligned. Whether called sheetrock or sheetrock installation, this installation stage benefits from a clean, deliberate approach. A drywall lift makes hanging drywall safer and more accurate, especially on a ceiling. When installing drywall, each panel should fit neatly around openings, access panels, and every corner. Proper corner bead creates a crisp, durable corner, while the right bead, tape, taping, and compound prepare the surface for a smooth finish. Good safety practices also help control dust. For drywall installation hanging, dependable tools and thoughtful preparation create a lasting foundation for finishing.
Hanging drywall begins with a careful review of the framing. Studs and ceiling joists should be straight, secure, and evenly spaced. Even excellent drywall installation cannot hide major framing issues for long. At MrWalls Drywall & Painting, we inspect the framing, confirm the layout, and snap chalk lines to keep drywall sheets straight and drywall screws consistently placed.
For walls, drywall panels are usually installed perpendicular to the framing when practical. We stagger joints between courses to strengthen the installation and avoid long, continuous seams. Each drywall panel is fitted with tight, even joints and proper clearance at the floor. We measure and cut cleanly around doors, windows, outlets, fixtures, and access panels using the right drywall tools and tools for crisp, accurate results.
ceiling work requires added planning and control. A full panel can be heavy and difficult to handle overhead, so a drywall lift is often the safest, most precise choice. It holds each sheetrock panel securely while protecting the board and the installer. Practical safety measures, including eye protection, stable footing, proper handling, and dust control, help protect the crew, the home, and nearby materials.
Once each sheet is firmly seated, drywall screws are installed in a deliberate, consistent pattern. screws should create a slight dimple in the paper without breaking it. Fasteners driven too deep lose holding power, while proud screws can interfere with compound, tape, and taping. We select the right screws for the framing and provide solid support at edges, field areas, corner details, and ceiling panels. saws are used for precise adjustments, never in place of careful layout.
This disciplined drywall installation hanging process creates a stable, smooth surface with clean joints and properly positioned fasteners. It provides the foundation needed for crisp, paint-ready walls, including refined corner bead and bead details. Whether a project involves hanging, installing drywall, sheetrock, or sheetrock installation, careful preparation helps the finished work look as polished as it performs.
Installing drywall can seem simple: measure the walls, hang the boards, and finish the joints. A polished result takes careful planning, quality materials, precise cuts, and patient finishing. The best approach depends on the size of the installation, the condition of the framing, the ceiling height, and how smooth you want the finished surface to be.
DIY drywall installation can work well for a small repair, access panels, or one uncomplicated wall. If you are comfortable measuring, cutting, and working overhead, you may be ready for basic sheetrock installation or hanging drywall with a clear plan. Essential drywall tools include a utility knife, T-square, level, rasp, screw gun, joint knives, saws, sanding equipment, drywall screws, and other proper fasteners. Mark chalk lines before hanging drywall. Then inspect framing for bows, loose blocking, moisture damage, and uneven corners. Drywall sheets cannot correct walls that are out of plane. After paint, those flaws can stand out even more.
For a ceiling, larger rooms, or heavier drywall panel sizes, a drywall lift is a smart safety investment. It holds panels in place during drywall installation hanging, so you can position each drywall panel securely before adding screws. Never balance drywall sheets overhead or ask one person to carry more than they can safely manage. Wear eye protection, gloves, and a properly fitted respirator when you cut, sand, or apply compound. Drywall dust spreads quickly, so protect nearby rooms, floors, and furnishings. Use a vacuum rated for fine dust instead of sweeping it back into the air.
Partial professional help offers a practical middle ground. You may handle demolition, insulation access, or hanging yourself, then bring in MrWalls Drywall & Painting for tape, taping, compound application, and finish sanding. This option can preserve sweat-equity savings while placing appearance-sensitive work in experienced hands. It is especially helpful where new walls meet existing textures, at every corner, around corner bead, or where repairs need to blend with painted surfaces. It also makes sense when a smooth Level 4 or Level 5 finish is planned.
Full-service installation is often the better choice for multi-room renovations, damaged ceilings, water-damage rebuilds, complex layouts, or projects with high ceilings and demanding timelines. Our team handles materials planning, hanging, joint treatment, corner bead, sanding, cleanup, and paint-ready preparation in one coordinated scope. We bring the right tools and a proven process to every drywall installation. The result is fewer handoffs, less disruption at home, and a finished surface designed to hold up under close inspection, not simply look acceptable on move-in day.
A dependable drywall installation starts with a careful room-by-room assessment, not just measurements. At MrWalls Drywall & Painting, we review framing, moisture exposure, existing damage, access, and safety needs for every ceiling and wall. We also consider access panels, corner conditions, and the right drywall panel, drywall sheets, sheetrock, materials, and panels for each space. Before hanging drywall or installing drywall, our team uses trusted drywall tools, tools, chalk lines, saws, a drywall lift, drywall screws, screws, tape, compound, and corner bead to support precise drywall installation hanging. From the first cut to the final taping and smooth finish, we plan every detail, including bead placement, dust control, and durable walls, so your sheetrock installation is built to last.
Not all drywall sheets suit the same conditions. In bathrooms, recurring humidity calls for moisture-resistant panels, especially around tubs, showers, and poorly ventilated areas. These materials handle occasional dampness better than standard board, but they are not a replacement for a properly waterproofed shower assembly. Where direct water exposure is expected, choose the surrounding wall system with tile, backer board, and waterproofing requirements in mind. The right drywall panel helps support a durable finish on bathroom walls.
Basements need a careful assessment before drywall installation begins. We check for active leaks, previous water damage, foundation-wall moisture, and proper insulation and vapour control. When the space is dry and well prepared, moisture-resistant drywall can be a practical choice for finished basement walls. Access panels can also help preserve service access where needed. The source of moisture must be fixed first; new panels cannot solve a drainage or humidity problem concealed behind them.
For garages, the right drywall often depends on the assembly separating the garage from the home. Fire-rated drywall may be required on shared walls and ceiling areas, depending on local code and the property layout. Garages also benefit from durable materials that can handle temperature swings, stored equipment, and everyday wear. We confirm the complete assembly before installation rather than treating the area like a standard interior room.
Ceiling work has its own requirements. Ceiling-rated drywall sheets help resist sagging when properly fastened to sound framing. Sheet thickness, joist spacing, insulation above, and the weight of any texture all matter. For drywall installation hanging, crews use a drywall lift to support each drywall panel, mark chalk lines, make each cut with appropriate saws, and secure panels with drywall screws. Hanging drywall also requires the right drywall tools, tools, screws, tape, compound, taping, corner bead, and bead details at each corner. During sheetrock installation and installing drywall, safety measures help control dust and protect the work area. Whether you need a ceiling repair or a clean, smooth replacement after popcorn ceiling removal, the best result starts with the right panel and a stable substrate.
| Area | Primary condition to assess | Suitable drywall consideration | Important limitation or installation note |
|---|---|---|---|
| Bathroom | Repeated humidity, especially near showers, tubs, and poorly ventilated areas | Moisture-resistant panels | These panels tolerate occasional dampness but do not replace a properly waterproofed shower assembly where direct water exposure is expected. |
| Basement | Active leaks, past water damage, foundation-wall moisture, insulation, and vapour control | Moisture-resistant drywall for dry, properly prepared finished walls | Resolve drainage and humidity sources first; new drywall cannot correct moisture problems behind the wall. |
| Garage | The wall or ceiling assembly separating the garage from the home, plus temperature swings and wear | Fire-rated drywall where required, with durable materials for garage conditions | Fire-rated drywall requirements depend on local code and property layout, so the assembly should be confirmed before installation. |
| Ceiling | Framing condition, joist spacing, sheet thickness, insulation above, and texture weight | Ceiling-rated drywall sheets selected to resist sagging | Proper fastening and a stable substrate are necessary for the panels to perform as intended. |
Not every wall or ceiling is ready for a simple installation. Homes can show signs of past leaks, settling, removed fixtures, outdated textures, or repairs that never blended well. MrWalls Drywall & Painting takes a careful approach to every condition. The team checks what is beneath the surface, addresses the cause when possible, and restores a stable, smooth plane for the final finish.
Water damage requires extra care. Before repairs begin, the moisture source should be resolved and the affected area must dry completely. Soft gypsum, staining, loose tape, or damaged insulation may need removal rather than simple coverage. Once the structure is sound, new drywall sheets can be cut and installed. Seams are taped, and compound is applied in controlled coats for a consistent surface. This process helps prevent visible seams, recurring blemishes, and early paint failure.
Ceiling repairs call for a precise eye because overhead light can reveal even small variations. Whether the work includes patching damage, replacing a panel after a leak, creating access panels, or preparing a ceiling after popcorn texture removal, the goal is a repair that blends into the surrounding field. Proper backing, accurate drywall panel placement, well-feathered compound, and thorough sanding all matter. Filling a hole and hoping paint will hide it is not enough. For larger panels, a drywall lift provides safer, more precise placement while hanging drywall.
Outside corners are another common point of wear. A damaged corner bead can crack, dent, or pull away from the wall, leaving the corner looking unfinished even after repainting. Replacing or resetting the bead, then rebuilding the surrounding compound, creates a straight, durable edge for everyday traffic. Small issues also receive focused attention, including nail pops, stress cracks, failed patches, and loose drywall screws. From chalk lines and thoughtful cut planning to the right drywall tools, saws, screws, tape, and materials, each repair is matched to the condition at hand rather than handled with a one-size-fits-all fix.
The final stage makes quality drywall work feel complete. Seams are checked from multiple angles, edges are refined, and the surface is sanded to a clean, smooth finish ready for paint. Careful preparation matters most in rooms with broad windows, recessed lighting, or darker paint colors, where dust and minor flaws are easier to notice. Whether the project involves sheetrock installation, installing drywall, or drywall installation hanging, the right tools, sound safety practices, and deliberate taping make a clear difference. By treating repair work and new installation as one finish system, MrWalls Drywall & Painting delivers walls and ceilings that are more than patched, they are ready for the next step.
A well-managed drywall project should feel clear well before the first sheet is hung. At MrWalls Drywall & Painting, we begin with a practical review of the room, existing walls, and ceiling condition. We also discuss the finish you want at completion. Whether you need drywall installation in a new space, repairs after water damage, or popcorn ceiling removal, a reliable estimate starts with an in-person assessment. Room access, framing, patch size, texture, trim, and protection for finished areas all affect the scope of work.
A clear estimate separates labour, materials, and project-specific preparation. It should outline the drywall type and thickness, insulation or vapour barrier needs, compound, tape, fasteners, drywall screws, corner bead, and any required bead or corner repairs. It should also confirm texture matching, primer, and paint when included. For a drywall panel or multiple drywall sheets, the estimate can identify the panel layout, panels required, and whether sheetrock or sheetrock installation is the right fit for the space. If access panels are needed for plumbing, electrical shutoffs, or future servicing, their location and finish should be confirmed before work begins. That small step can prevent an inconvenient cut into a newly finished wall later.
Preparation protects your home and sets the standard for the finished installation. Furniture is moved or covered, floors are protected, and nearby rooms may be sealed off to control dust. Demolition, sanding, and ceiling work can be disruptive, so an experienced crew plans containment and cleanup from the start. Before installing drywall, the team confirms that framing is sound, surfaces are dry, and behind-the-walls plumbing or electrical work is complete and inspected as required. Chalk lines help guide accurate placement, while the right drywall tools, tools, saws, and drywall lift support safe, efficient work. For drywall installation, hanging drywall and the drywall installation hanging sequence should be planned before the boards go up. This is also the time to confirm outlets, fixtures, recessed boxes, and access panels.
The final walkthrough is more than a quick look around. It is a chance to review seams, corners, repairs, texture, taping, and the overall finish in normal room lighting. A professional drywall installation should provide clean transitions at trim and openings, consistent surfaces across repaired and new walls, and a ceiling that looks smooth from the floor. Minor touch-ups are best identified together, with clear expectations for completion. The crew should remove protective coverings, collect debris, and leave the space ready for its next stage, whether that means painting, flooring, cabinetry, or simply moving life back into the room.
Homeowners often have practical questions before scheduling drywall installation hanging work. Your project may include framing, insulation, repairs, access panels, or a newly finished room. At MrWalls Drywall & Painting, we explain each step clearly, from the estimate through the final coat of paint.
What is involved in hanging drywall? Proper hanging drywall begins with straight, secure studs, ceiling joists, and reliable backing. Before installing drywall, we inspect the framing, mark chalk lines, and confirm that all materials are on site. We measure and cut drywall sheets carefully using the right drywall tools, saws, and safety practices. A drywall lift helps position each ceiling drywall panel safely and precisely. We arrange panels to reduce seams, then fasten every panel securely. Ceiling panels typically go up before walls for a smooth, durable finish.
Are drywall screws better than nails? For most residential installation projects, drywall screws are the preferred choice. They offer dependable holding power and are less likely to loosen or create nail pops as framing shifts over time. Screw length, spacing, and depth matter. Screws should sit just below the paper surface without breaking it. Overdriven screws can weaken the hold and add repair work during finishing.
How long does installation and finishing take? Timing depends on room size, access, ceiling height, seam count, and the condition of the existing framing. Hanging drywall can move quickly, but taping requires several careful stages. Compound needs sufficient drying time between coats. Each coat is sanded, inspected, and prepared for texture, primer, or paint. We also contain dust throughout the process. Our team provides a realistic schedule, not a rushed promise.
Why is taping so important? Taping turns individual drywall boards into one continuous surface across walls and ceiling areas. We embed tape in compound over each joint, then apply additional coats that feather away from the seam. Every corner, fastener head, and transition receives close attention. Corner bead protects outside corners and creates a crisp, straight edge. The finished surface should look smooth in normal light and hold up to everyday use.
Can you match an existing wall texture? Yes. Whether your home has a smooth finish, orange peel, knockdown texture, or another common treatment, we can blend new work with the surrounding walls. Texture matching is especially helpful after water damage repairs, electrical updates, or partial wall removal. We can also match sheetrock repairs as part of a larger sheetrock installation.
Should drywall be primed before painting? Absolutely. New drywall and fresh compound absorb paint differently. Quality primer creates an even base for the final color and helps reveal minor surface inconsistencies before painting begins. MrWalls Drywall & Painting can manage the full drywall installation process, from hanging and taping to a clean, paint-ready finish.
Professional drywall installation includes assessing framing, measuring and cutting panels, installing backing where needed, fitting sheets around openings, fastening panels correctly, and preparing joints, corners, and surfaces for taping, finishing, primer, and paint.
For most residential walls, horizontal installation helps reduce the number of seams and can create a stronger layout when joints are staggered. The best direction depends on wall height, framing, panel size, openings, and the finish required.
Minor inconsistencies may be addressed with shimming, planing, blocking, or other preparation. Significant bows, loose studs, or uneven ceiling joists should be corrected before panels are hung, since drywall will not hide major framing defects.
Moisture-resistant drywall is often appropriate for humid bathrooms and properly dry, finished basements. Areas exposed directly to water, such as shower surrounds, need a suitable backer board and waterproofing system rather than standard drywall.
Yes. Ceiling panels need adequate framing support, an appropriate fastening pattern, and careful handling to prevent sagging, seam movement, and screw pops. A drywall lift is often used to position full sheets safely and accurately overhead.
Yes, once the moisture source has been corrected and the area is fully dry. Damaged gypsum, insulation, tape, or framing concerns are evaluated before new drywall is installed, finished, sanded, and blended with surrounding surfaces.
Professional help is often worthwhile for ceilings, large rooms, high walls, water-damage rebuilding, texture matching, complex remodels, and smooth Level 4 or Level 5 finishes. Small, simple repairs may be manageable for experienced homeowners with proper tools and safety practices.
Cost depends on room size, ceiling height, drywall type and thickness, framing repairs, access, demolition, number of openings, corner bead, texture matching, finish level, dust protection, and whether painting is included in the project scope.